Installation How To Vista/Cache for Windows: Difference between revisions
Step 41 clean up |
minor changes to dsommers' comments |
||
| Line 653: | Line 653: | ||
<tr> | <tr> | ||
<td style="padding:0.5em;"> | <td style="padding:0.5em;"> | ||
<p><strong>Prompted for ACCESS CODE | <p><strong>Prompted for ACCESS CODE:</strong></p> | ||
<p>Type <b>S DUZ=1</b> before entering into D Q^DI</p> | <p>Type <b>S DUZ=1</b> before entering into D Q^DI</p> | ||
</td> | </td> | ||
| Line 760: | Line 749: | ||
<p>At the VISTA> prompt, type "W $I". The first set of characters needs to match your DEVICE settings for $I.</p> | <p>At the VISTA> prompt, type "W $I". The first set of characters needs to match your DEVICE settings for $I.</p> | ||
<p>Start Fileman (D Q^DI)<br/> | <p>Start Fileman (D Q^DI)<br/> | ||
Select OPTION: 1 (for ENTER OR EDIT...)<br/> | <code>Select OPTION: 1 (for ENTER OR EDIT...)<br/> | ||
INPUT TO WHAT FILE: DEVICE<br/> | INPUT TO WHAT FILE: DEVICE<br/> | ||
EDIT WHICH FIELD: $I<br/> | EDIT WHICH FIELD: $I<br/> | ||
THEN EDIT FIELD:<br/> | THEN EDIT FIELD:<br/> | ||
Select DEVICE NAME: CONSOLE<br/> | Select DEVICE NAME: CONSOLE<br/> | ||
$I: |TNT|// |TRM|<br/> | $I: |TNT|// |TRM|</code><br/> | ||
</p> | </p> | ||
<p>Note my setting is |TRM| while CACHE.DAT was defaulted to |TNT|</p> | <p>Note my setting is |TRM| while CACHE.DAT was defaulted to |TNT|</p> | ||
| Line 1,484: | Line 1,473: | ||
</td> | </td> | ||
</tr> | </tr> | ||
<tr><td colspan="2"> | |||
<table style="font-size: 0.9em; width:80%; background:#F1F1ED; margin: 0 0 1em 1em;"> | |||
<tr> | |||
<td style="padding:0.5em;"> | |||
<p><strong>Enhance the Programmer's Menu:</strong></p> | |||
<p><code> | |||
Select OPTION to edit: XUPROG<br/> | |||
1 XUPROG Programmer Options<br/> | |||
2 XUPROGMODE Programmer mode<br/> | |||
CHOOSE 1-2: 1 XUPROG Programmer Options<br/> | |||
NAME: XUPROG//<br/> | |||
MENU TEXT: Programmer Options// ^10 MENU<br/> | |||
Select ITEM: XUPR-ROUTINE-TOOLS// XT-OPTION TEST Test an option not in your menu<br/> | |||
Are you adding 'XT-OPTION TEST' as a new MENU (the 7TH for this OPTION)? No//<br/> | |||
Y<br/> | |||
(Yes)<br/> | |||
MENU SYNONYM:<br/> | |||
SYNONYM:<br/> | |||
DISPLAY ORDER:<br/> | |||
</code></p> | |||
</td> | |||
</tr> | |||
</table> | |||
</td></tr> | |||
<tr><td colspan="2"> </td></tr> | <tr><td colspan="2"> </td></tr> | ||
Revision as of 21:41, 11 October 2005
Installation Overview
Version
These instructions have been designed for the following:
- Operating system: Microsoft® WindowsTM XP service pack 2.
- VistA version/release number: _____
- Cache version: _____ for Microsoft® WindowsTM XP.
Terminology
See the VistA introduction on the Main Page for important information on basic concepts and terminology that you must be familiar with in order to understand the installation instructions.
- M and MUMPS
- CPRS
- Broker
- VistA Domain
- Patient Records
- Terminal Client
- Server Tools
Basic Steps
Installation of VistA consists of the following general steps:
- Install Cache
- Install the VistA Package for Cache
- Reconfigure some files
- Set up the VistA Domain
- Set up the Master Records
- Set up the Broker Service
- Start the VistA Process
- Install CPRS
- Test CPRS
The rest of this installation how to will guide you through all of these steps.
Command Summary
The command summary here is used in M to perform various VistA tasks. It is placed in the beginning of the document so you can easily refer to it. You won't understand any of this until you begin installing VistA, so you can skip reading this and go on to the next section.
Installing VistA
Install Cache
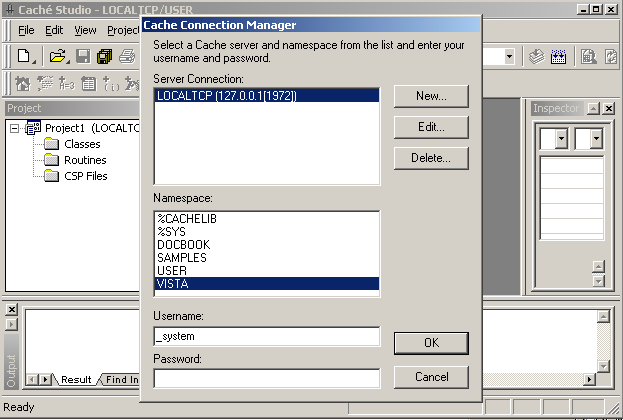
This phase of the installation creates an area (a namespace) for you to work in and point that namespace to the distributed VistA database.
| 1. | Install Caché (The free single user version of Caché from <a href="http://www.intersystems.com">www.intersystems.com</a>). These are the instructions for the Windows version. Accept all of the defaults. |
| 2. | Create the directory c:\CacheSys\Mgr\Vista and unzip CACHE.zip into
it. The Cache.zip file we used was dated 4/5/2003 and was 137 Mb (141,243,089 bytes). The unzipped CACHE.DAT was also dated 4/5/2003 and was 430 Mb (451,379,200 bytes). |
| 4. | Right Click on the Caché Cube and choose Documentation. Make sure
it opens up and you can search it. If it doesn't, it is likely a firewall is blocking your access to CacheWeb. As of 5/03, McAfee firewall will need to be uninstalled entirely and other firewalls may need to be disabled. <a href="mailto:support@intersys.com">support@instersys.com</a> can help you if you need it. If all goes well opening the documentation, then continue. |
| 5. | Right Click on the Caché Cube again and choose Configuration Manager. |
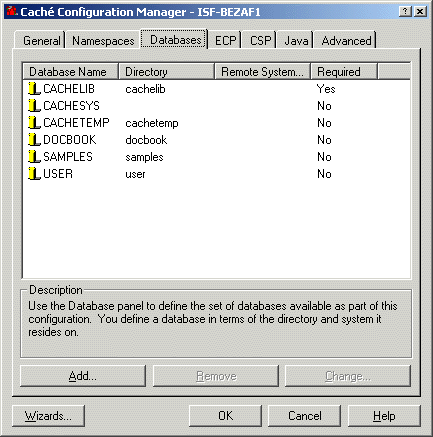
| 6. | Choose Databases tab then click Add. A database is a physical disk location where M programs and data are located. |
 |
|
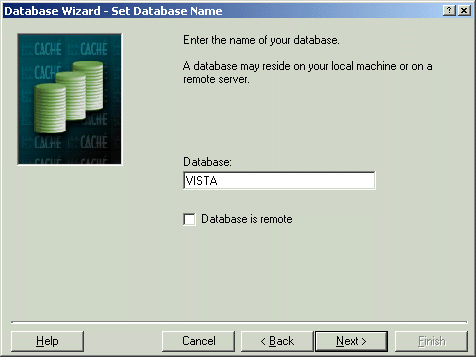
| 7. | Type "VISTA" in the Database window then click Next>. |
 |
|
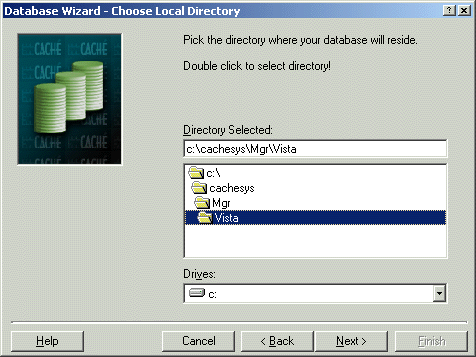
| 8. | Pick location C:\Cachesys\Mgr\Vista then click Next. |
 |
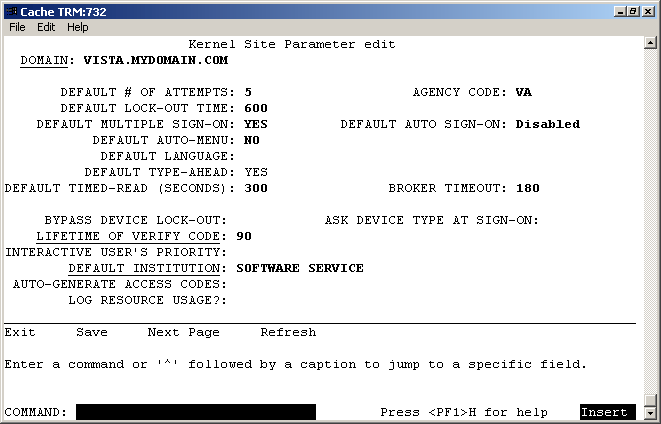
|
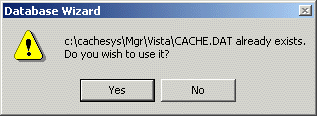
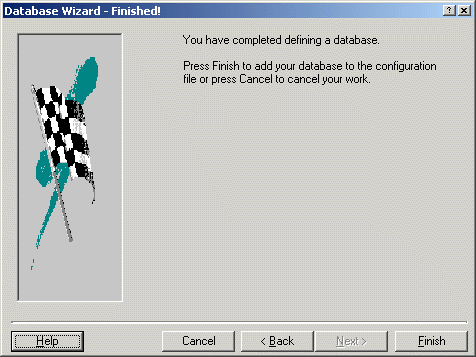
| 9. | Answer Yes to the question do you wish to use CACHE.DAT and then click Finish. |
 |
|
 |
|
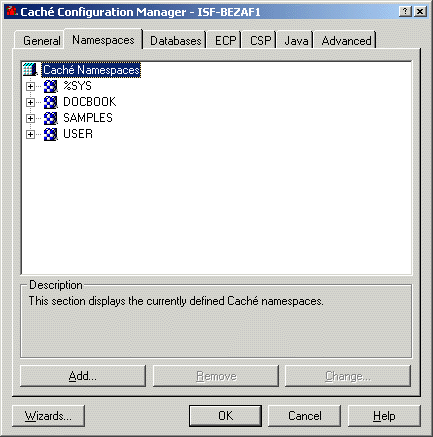
| 10. | Choose the Namespaces tab then click Add. (Cache documentation defines a Namespace as "A
logical entity or workspace that is associated with a directory, and that provides the link between a set of globals and their actual locations.") |
 |
|
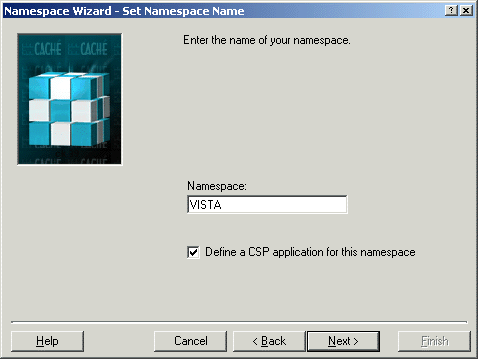
| 11. | Type in "VISTA" in the Namespace window then click Next. |
 |
|
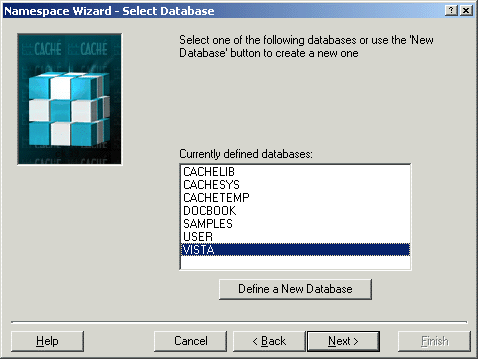
| 12. | From the list of Currently defined databases - Choose VISTA. |
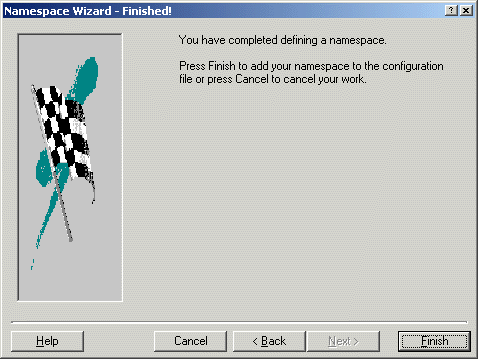
| 13. | Click Next then Finish. |
 |
|
 |
|
Mapping Globals and Routines to Datasets
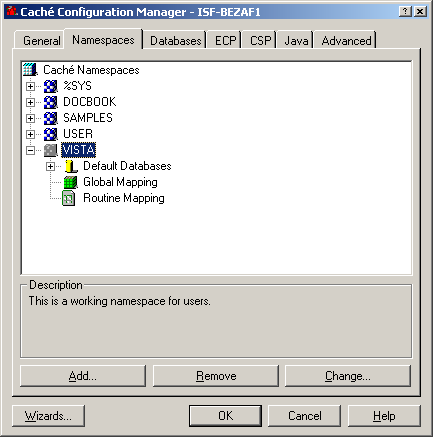
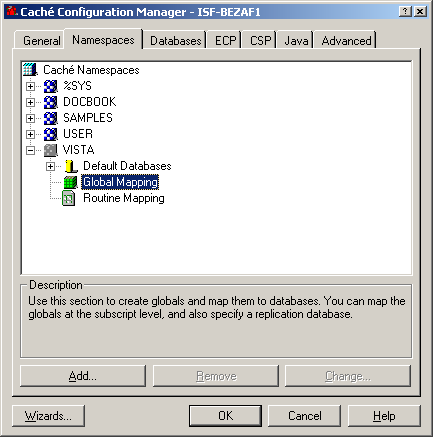
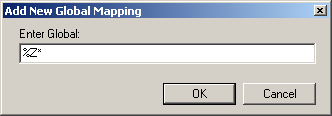
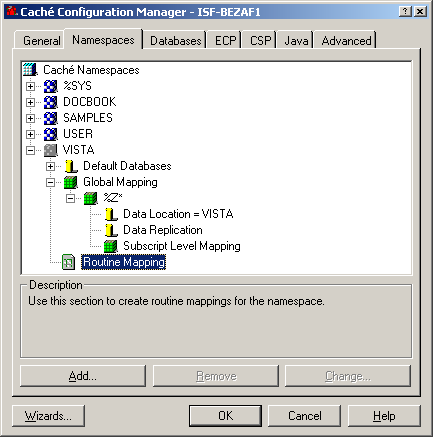
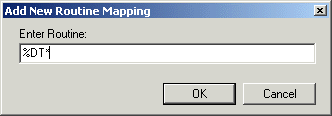
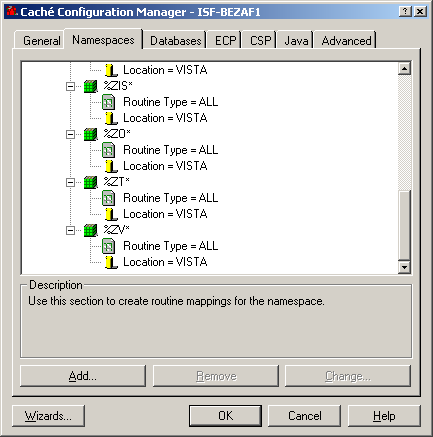
Globals are persistent M data structures where files and data are stored and routines are M programs. Mapping is a way to tell Caché where to look for globals and routines. By default, Caché maps routines and globals that start with the "%" character to a namespace separate from the routines and globals that do not start with the "%" character. With VistA, it is recommended that all VistA routines and globals that start with the character "%" be mapped to the same namespace as non-% routines and globals overriding the Caché default. The primary reason for this is to preserve these VistA globals and routines when Caché is upgraded to a new version.Convert the Database from Use in Caché 4 to Caché 5
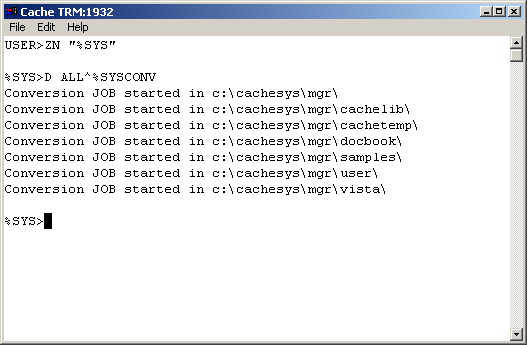
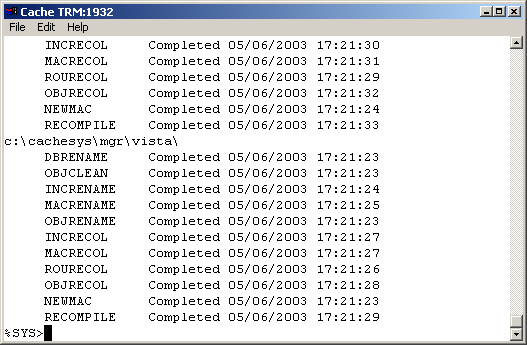
The distributed FOIA CACHE.DAT was generated with Caché v4. It needs to be converted to be compatible with Caché v5. You will not need to perform this step if you version is compatible with the version used by the VA.
Begin to set up the VistA System
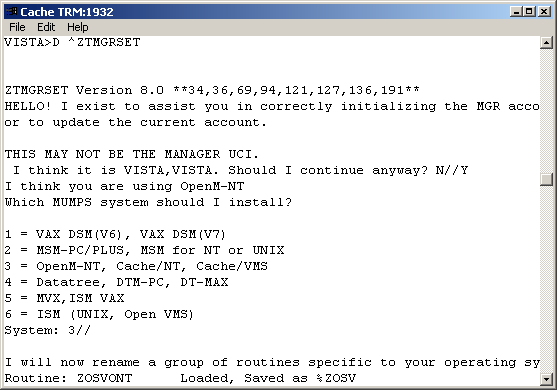
The routine ZTMGRSET defines VistA global variables and saves system wide M routines that are Caché specific. FileMan is the database system used by all VistA applications.
Set Yourself Up as the System Manager
This is a super user who will have elevated privileges. You can add other users such as Physicians, Pharmacists, etc. later.
| 49. | Now to set up the System Manager user with minimal information. We will add more information later. At Select OPTION: Type "1" (Type "??" to see Option 1 if you wish) |
| 50. |
At INPUT TO WHAT FILE: Type "200", the number of the NEW PERSON file. |
| 51. | At EDIT WHICH FIELD: ALL// Type ".01" and hit enter. It will echo back NAME. |
| 52. | It may respond with finish with NEW PERSON, 2 ENTRIES and then prompt you. |
| 53. |
At THEN EDIT FIELD: Type "ACCESS CODE" and the computer will finish it with Want to edit access code (Y/N)? Hit Enter and hit enter until you are prompted with Select NEW PERSON NAME. |
| 54. | At Select NEW PERSON NAME, Type "MANAGER,SYSTEM" or whatever you choose. |
| 55. |
At Are you adding "MANAGER,SYSTEM" as a NEW PERSON (the 2nd [or whatever it offers you])? No// type "Y". |
| 56. |
It will respond Checking SOUNDEX for matches. No matches found. NEW PERSON INITIAL: |
| 57. |
Type "SM" or whatever you choose. |
| 58. |
At Want to Edit ACCESS Code (Y/N): Type "Y". For NEW PERSON MAIL CODE: hit ENTER. |
| 59. |
Then enter an access code. (Type "??" and hit enter to see what the options are for access codes if you wish.) At least 6 mixed alphanumeric characters. If not, just type the code and hit enter. |
| 60. |
Retype the code as directed. FileMan will respond OK, Access code has been changed! The VERIFY CODE has been deleted as a security measure. The user will have to enter a new one the next time they sign-on. |
| 61. |
At Select NEW PERSON NAME: Hit enter. |
|
Select OPTION: 1 ENTER OR EDIT FILE ENTRIES |
|
| 62. |
At the Select OPTION: prompt Type "5". |
| 63. |
At OUTPUT FROM WHAT FILE: NEW PERSON// Hit Enter. |
| 64. |
At Select NEW PERSON NAME: Type "MANAGER,SYSTEM", or whatever you chose for the system manager name and hit enter. |
| 65. |
At ANOTHER ONE: Hit enter. |
| 66. |
At STANDARD CAPTIONED OUTPUT? YES// Hit enter or "Y". |
| 67. |
At Include COMPUTED fields: (N/Y/R/B): NO// type "B". |
| 68. |
The response will be a screen full of data. At the upper left hand corner will be NUMBER: followed by a number. This number will be the DUZ number that will be used in what follows below. |
| 69. |
Hit Enter until you back out to VISTA>. |
| 70. |
At VISTA> Type "SET DUZ= " and after the = sign, type in that number you found above for your DUZ number, and hit Enter. |
| 71. |
At the next VISTA> prompt, type S $P(^VA(200,DUZ,0),"^",4)="@". This will identify this user as a programmer to VA FileMan. |
| 72. |
At the next VISTA> prompt, type "D ^XUP". This is the VA Kernel's Programmer entry point. |
| 73. |
The first time, you will be asked to select a TERMINAL TYPE NAME:. Enter "C-VT100" and select 1. |
| 74. |
At Select OPTION NAME: Type "XUMAINT", it will echo back Menu Management. |
| 75. |
At Select Menu Management Option: type "KEY" Management; then at Select Key Management Option: "ALLO"cation of Security Keys. |
| 76. |
Proceed to allocate the following keys - XUMGR, XMMGR, XUPROG, XUPROGMODE. |
| 77. |
When it asks Holder of the key, enter "MANAGER,SYSTEM" or whatever name you selected. |
|
VISTA>S DUZ=1 XUPROG XUMGR XUPROGMODE XMMGR |
|
Set Up More Parameters
These are parameters that are more applicable to the VistA application software.
| 78. |
If you are planning to use the VistA applications such as Registration, Scheduling etc. you need to add new Institution to the INSTITUTION File. Go back to the VISTA> prompt and "SET XUMF=1" then "D Q^DI". Select Option #1 and edit File #4. Edit the field STATION NUMBER. For Station Number, you must enter the same number as the Site Number when you initialized FileMan. (See Start FileMan and <a href="#Vista_Setup">Begin Setting Up Vista section</a>.) |
|
VISTA>S XUMF=1 D Q^DI |
|
| 79. |
Then you need to add a Medical Center Division. Select File #40.8 and edit fields FACILITY NUMBER and INSTITUTION FILE POINTER. Enter the Institution STATION NUMBER for FACILITY NUMBER and the name of the Institution in INSTITUTION FILE POINTER. |
|
Select OPTION: 1 ENTER OR EDIT FILE ENTRIES |
|
| 80. |
You are now ready to enter additional information for the system manager user like PRIMARY MENU, VERIFY CODE etc. |
| 81. |
Go back to the VISTA prompt and type "D ^XUP". |
| 82. |
At Select OPTION NAME: Type "XUSEREDIT", it will give you two choices, select 1. |
| 83. |
At Select NEW PERSON NAME: Type the name you chose for Manager, System. |
|
VISTA>D ^XUP |
|
| 84. |
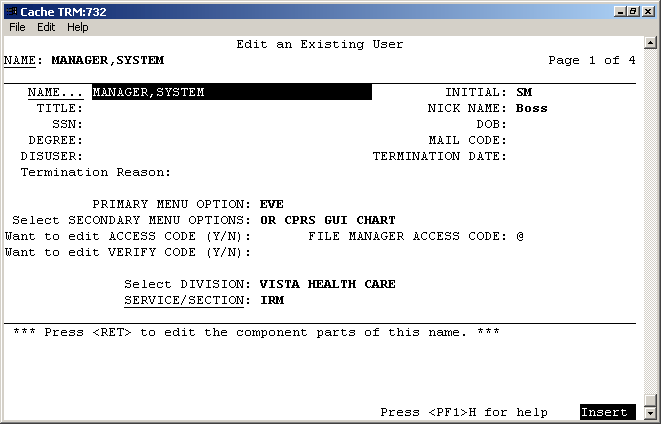
Now you will be presented with a screen with multiple options. You can navigate the screen with the TAB key. For navigation help, use your keyboard arrows to move down to the command line and hold down either the Num Lock key (which is mapped as PF1 of a VT-320 terminal by Caché) or F1 for other terminal emulations and hit "H" and then Enter for help. You can exit by typing "^" on the command line and the change you made will be saved. As a minimum, assign EVE as the PRIMARY MENU and enter IRM (it's the only choice) as SERVICE/SECTION. If you plan to use CPRS, enter OR CPRS GUI CHART as a SECONDARY MENU OPTION. Enter other data as you deem appropriate. |
 |
|
| 85. |
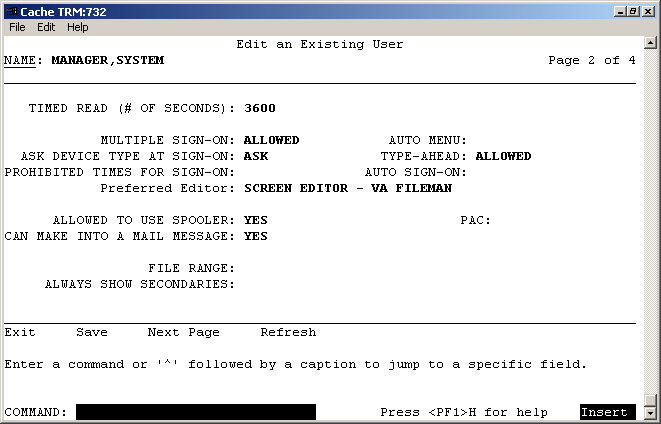
Type "N"EXT PAGE at COMMAND: to go to page 2 to update the TIMED READ field and other fields you wish to update. For DEFAULT TIMED-READ (SECONDS): if you change it to 3600 you will be allow an hour before being automatically signed off. It makes it easier to work when you are learning and setting things up. |
|
Press <PF1> refers to notations for use of Vista on Terminals. For example, the original VT-320 keyboard had additional character sets and keys which include Find, Select, Insert, Remove, Previous Screen, Next Screen, an arrow cluster and F1 to F20. With Caché, the Keys are "mapped", which means when you push a given key it acts as the key would in a terminal. For instance, F1, F2, F3 and F4 are equivalent to the PF1, PF2, PF3 and PF4 keys on the terminal keyboard and Page Up and Page Down on the computer keyboard correspond to Previous Screen and Next Screen. A listing of other mappings can be found at the Caché Cube Terminal window under Help and search Keyboard Mappings. Also there is lots of information about terminal if you are interested at <a href="http://www.VT100.net">www.VT100.net</a>. |
|
 |
|
Set Up Menus for the System Manager
| 86. |
The next step is to make FileMan, MailMan, and Manage MailMan menus accessible to the System Manager user from the menu system. From the VISTA prompt, type "D ^XUP". At Select OPTION NAME: enter "XUMAINT". Then at Select Menu Management, type "EDIT OPTIONS", then pick EVE. |
|
| 87. |
Select 1 from the list then at NAME: EVE// type "^10". |
|
| 88. |
At Select ITEM: enter "DIUSER". Hit enter until you get to Select ITEM again (you may enter data for the other fields like SYNONYM if you wish). |
|
| 89. |
At the next Select ITEM: enter "XMMGR". |
|
|
VISTA>D ^XUP |
||
| ||
| 90. |
Exit by entering "^" at any prompt. At the next Select OPTION to edit: enter "XUCOMMAND". Then at NAME: XUCOMMAND// type "^10". At Select ITEM: enter "XMUSER". |
|
|
Select OPTION to edit: XUCOMMAND SYSTEM COMMAND OPTIONS MENU SYNONYM: MM SYNONYM: MM// |
||
| 91. |
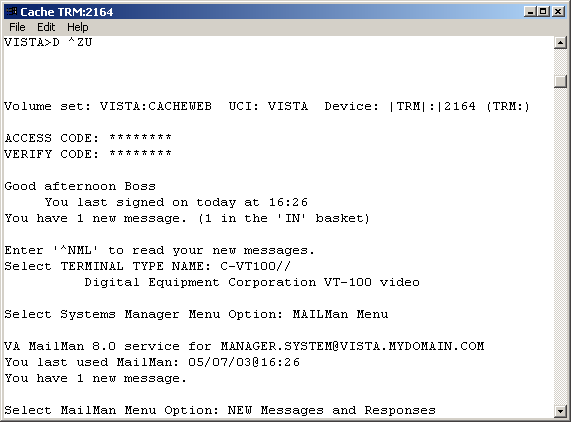
To change the default time it takes before users are automatically signed off the system from the default of 300 seconds. This, again, is to give you more time to work as you are learning. Back out to the VISTA prompt. At the VISTA prompt, Type "D ^ZU". |
|
| 92. |
At ACCESS CODE, type in the code you chose when setting up MANAGER, SYSTEM as a NEW PERSON. |
|
| 93. |
At VERIFY CODE, hit ENTER. When asked for a new verify code, type the code you choose and remember it. |
|
| 94. | At Select Systems Manager Menu Option: Type "OPER", (short for operations management) and hit enter. You can see all of the choices available to you if you type "??". | |
| 95. |
At Select Operations Management Option: Type "KER" short for Kernel Management Menu and hit enter. At Select Kernel Management Menu Option: Type "ENT", short for Enter/Edit Kernel Site Parameters. Hit enter. |
|
| 96. |
You will be presented with a similar screen as in editing the SYSTEM MANAGER characteristics. You can navigate the screen with the TAB key. For DEFAULT TIMED-READ (SECONDS): change it to 3600 to allow an hour before being automatically signed off, or whatever you choose. |
|
 |
||
Update the Devices, Start Taskman and Mail a Message
These are basic devices to complete the setup. You can setup other devices, such as printers, later.
| 97. |
Now to update devices. The Platinum CACHE.DAT already comes with preconfigured devices. It is best to leave the VOLUME SET(CPU) field blank. The help text for the field states: "If no name has been entered for this field, this device is assumed to be accessible from all CPUs in the network. In other words, when this device is referenced, the device handler will operate as if this device is resident on the local CPU". The SIGN-ON/SYSTEM DEVICE: field should be set to NO or left blank for output devices and YES if the device is used to log on to the system. Use FileMan to edit the CONSOLE, NULL, HFS, and TELNET devices. CONSOLE is the primary logon device. The NULL device is used by the Vista RPC Broker and HFS is used by the Kernel Installation and Distribution System (KIDS) to install application patches and new applications when they are released. On the single user Caché PC you will not need the TELNET device since it does not allow remote access. At the VISTA> prompt, type "D Q^DI" to invoke VA Fileman. At Select OPTION: type "1" (ENTER OR EDIT FILE ENTRIES) and at INPUT TO WHAT FILE:, enter "3.5". |
|
VA FileMan 22.0 SURE YOU WANT TO DELETE? Y (Yes) SIGN-ON/SYSTEM DEVICE: Y YES 1 NULL NT SYSTEM //./nul CHOOSE 1-2: 1 NULL NT SYSTEM //./nul |
|
|
If you see $I: NLA0://, replace it with //./nul for Windows/Cache.
|
98.
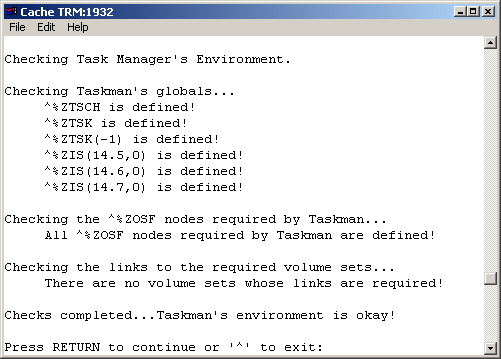
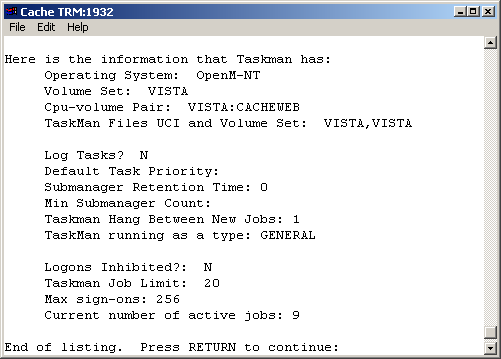
Again from the VISTA promt, enter "D ^ZTMCHK" to check if TaskMan's environment is OK. This will present you with two screens with information on TaskMan's environment.
If TaskMan's environment is OK, you are ready to start TaskMan. Go back to the VISTA prompt and type "D ^ZTMB" to start TASKMAN.
100.
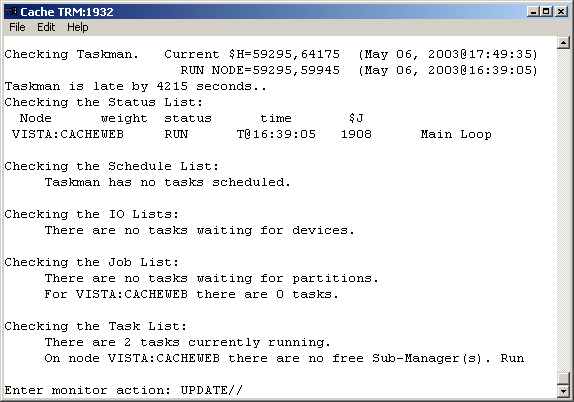
To monitor TaskMan, enter "D ^ZTMON" from the VISTA prompt. Enter "^" at the UPDATE// prompt to exit the monitor or enter a "?" to see what the other options are.
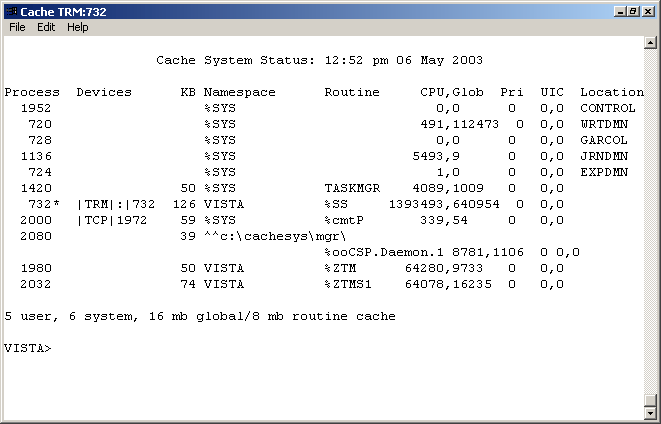
From the VISTA> programmer prompt you can check the system status with "D ^%SS". You should see at least two Taskman processes - %ZTM and %ZTMS.
Now send a message using Postmaster to your DUZ number. Use D ^%CD to get into the namespace, VISTA, and then type "S DUZ=.5 D ^XUP". You will get the response SETTING UP PROGRAMMER ENVIROMENT then TERMINAL TYPE SET TO: (your default) and Select OPTION NAME:. You will need to respond: "XMUSER". At Select Mailman Menu Option: type "S" (for send). At Subject: enter your subject, such as Test, and then hit enter. You will then be prompted You may enter the text of the message and you will be offered the line number 1> where you can type your message, such as the infamous Hello world. Next will be line 2> and if you are done, just hit enter and at EDIT Option: you can do the same. At Send mail to: POSTMASTER// enter the initials you used for your DUZ which were probably SM for System Manager. You will then be told when MailMan was last used, which is probably NEVER. Hit enter at And Send to: and you should receive the message Select Message option: Transmit now// at which you hit enter and will hopefully receive the message Sending [1] Sent. Type "^" to exit.
103.
Now see if you received it. Log on using "D ^ZU". At the Systems Manager prompt, type "MAIL". Then at the Select MailMan Menu Option: type "NEW" Messages and Responses. Read the mail.
Test CPRS
Start and test the RPC Broker.
The RPC Broker is VistA's Client/Server software and is needed by VistA's GUI client.
| 104. |
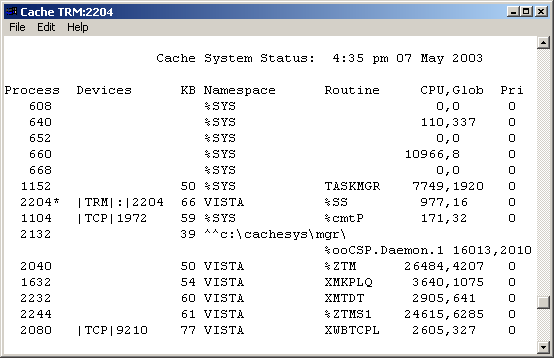
Now to see of the RPC BROKER will start. To start the broker, type "D STRT^XWBTCP(port)" at the VISTA prompt. The system status should now show the broker listener (XWBTCPL) running. |
|
VISTA>D STRT^XWBTCP(9210) |
|
| Now run "D ^%SS" again. You should see something like the following with XWBPTCL running. | |
 |
|
| 105. |
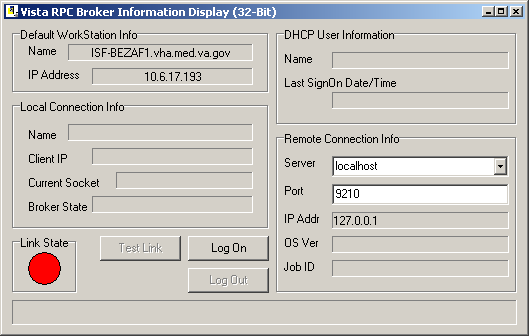
If you have the RPCTEST.EXT on your workstation, you test your connection to the localhost. Download the file XWB1_1WS.EXE from <a href="ftp://ftp.va.gov/vista/Software/Packages/RPC Broker - XWB/PROGRAMS/">ftp://ftp.va.gov/vista/Software/Packages/RPC Broker - XWB/PROGRAMS/</a>. (Note: The VA's ftp site is not compatible with Netscape's ftp. Either use Windows Explorer or FTP software). Double click on this file once you have downloaded it. Accept the defaults. It will install RPC Broker's Client software including RPCTEST.EXE. Then go to C:\program files\vista\broker\rcptest.exe and double click on it or create a shortcut on your desktop. |
 |
|
| 106. |
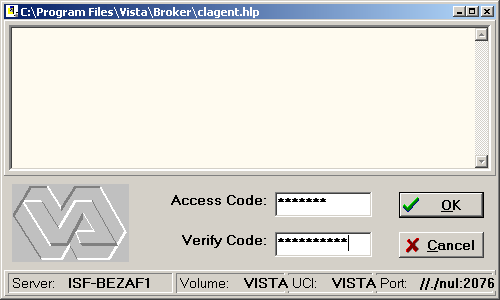
You should see a Vista logon screen. |
 |
|
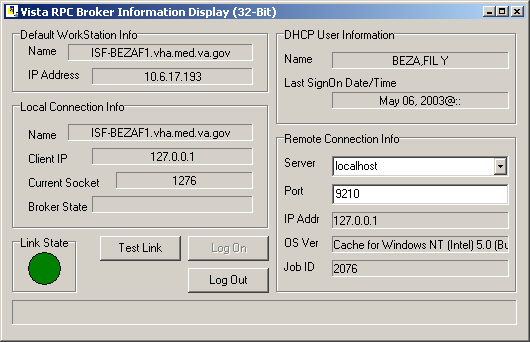
| 108. |
If you connect successfully, the link state will turn green. |
 |
|
| 109. |
To stop TaskMan, use "D STOP^ZTMKU" and answer "YES" to stopping the submanagers. |
| 110. |
To stop Broker, use "D STOP^XWBTCP(9210)". |
End of Chapter 1 ---> <a href="CPRSStart12.html">Chapter 2</a>
Work of Nancy Anthracite
being transfered from Hardhats.org by --gra'pa Z 12:54, 28 Aug 2005 (CDT)
Install the VistA Package for Cache
Reconfigure VistA Modules
Set up the VistA Domain
Set up the Master Records
Set up the VistA Proces
Install CPRS
Credits
Thank you to everyone.
